 Creature Comfort
A comfortable bed, air circulation and blinds are definitely important, but it's often the small things that makes the difference.
You probably have a night stand by your bed where you can put your book, mobile phone, alarm clock, ear plugs, etc... as well as some individual lights that allow you to read without waking up your partner.
Let's do that!
Let there be light

Of course there is LED lighting all over the place in the van, but switching on the 5 meters of bright yellow leds in the middle of the night is not really a comfortable solution.
Pro tip: If you thought using these cheap battery powered LED lights that use magnets to stuck to anything magnetics, just drop the idea. It gets so warm in a car when the sun in out that the glue that keep the magnets attached will most probably fail as you can see on the photo.

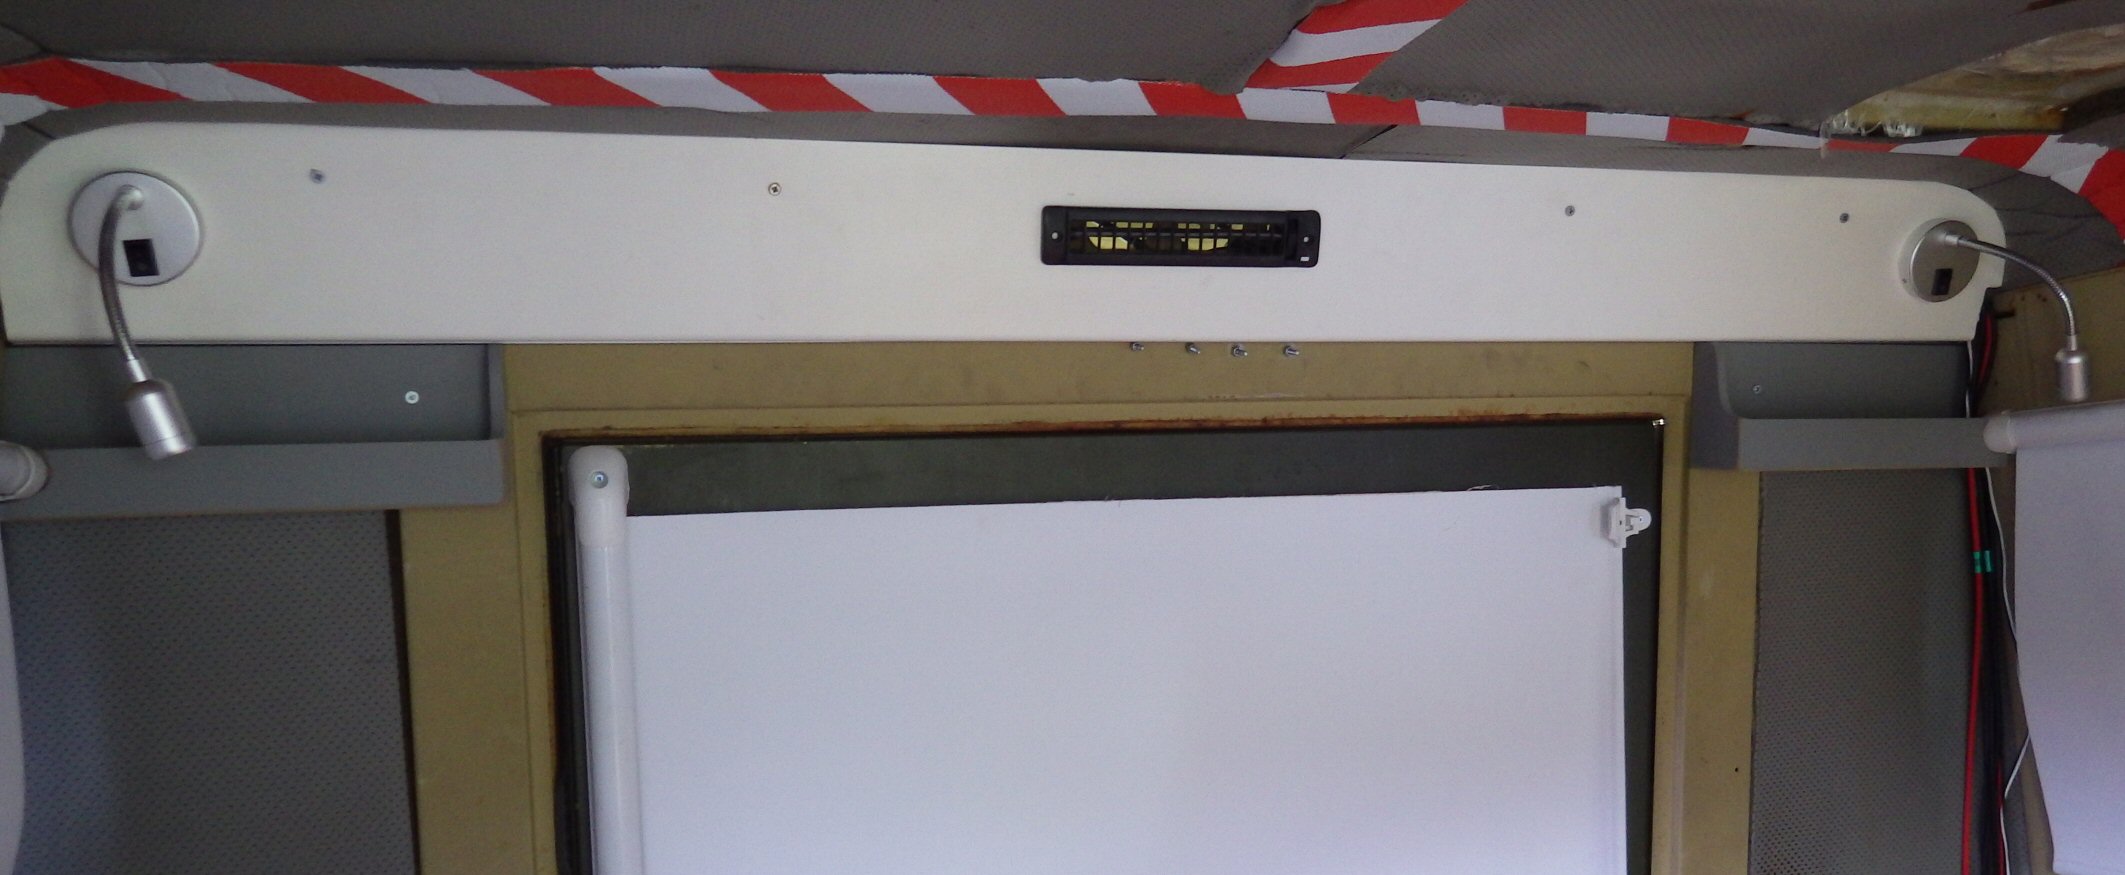
After a bit of work I came up with something decently elegant.
While doing some shopping in a warehouse store I found some long white MDF boards originally designed to be installed at the base of walls to hide the flooring imperfections.
After a bit of sawing and sanding, I finally got an almost perfect fit between the shape of the board and the curvature of the roof and managed secure it firmly using the holes already present in the body's metal sheet.
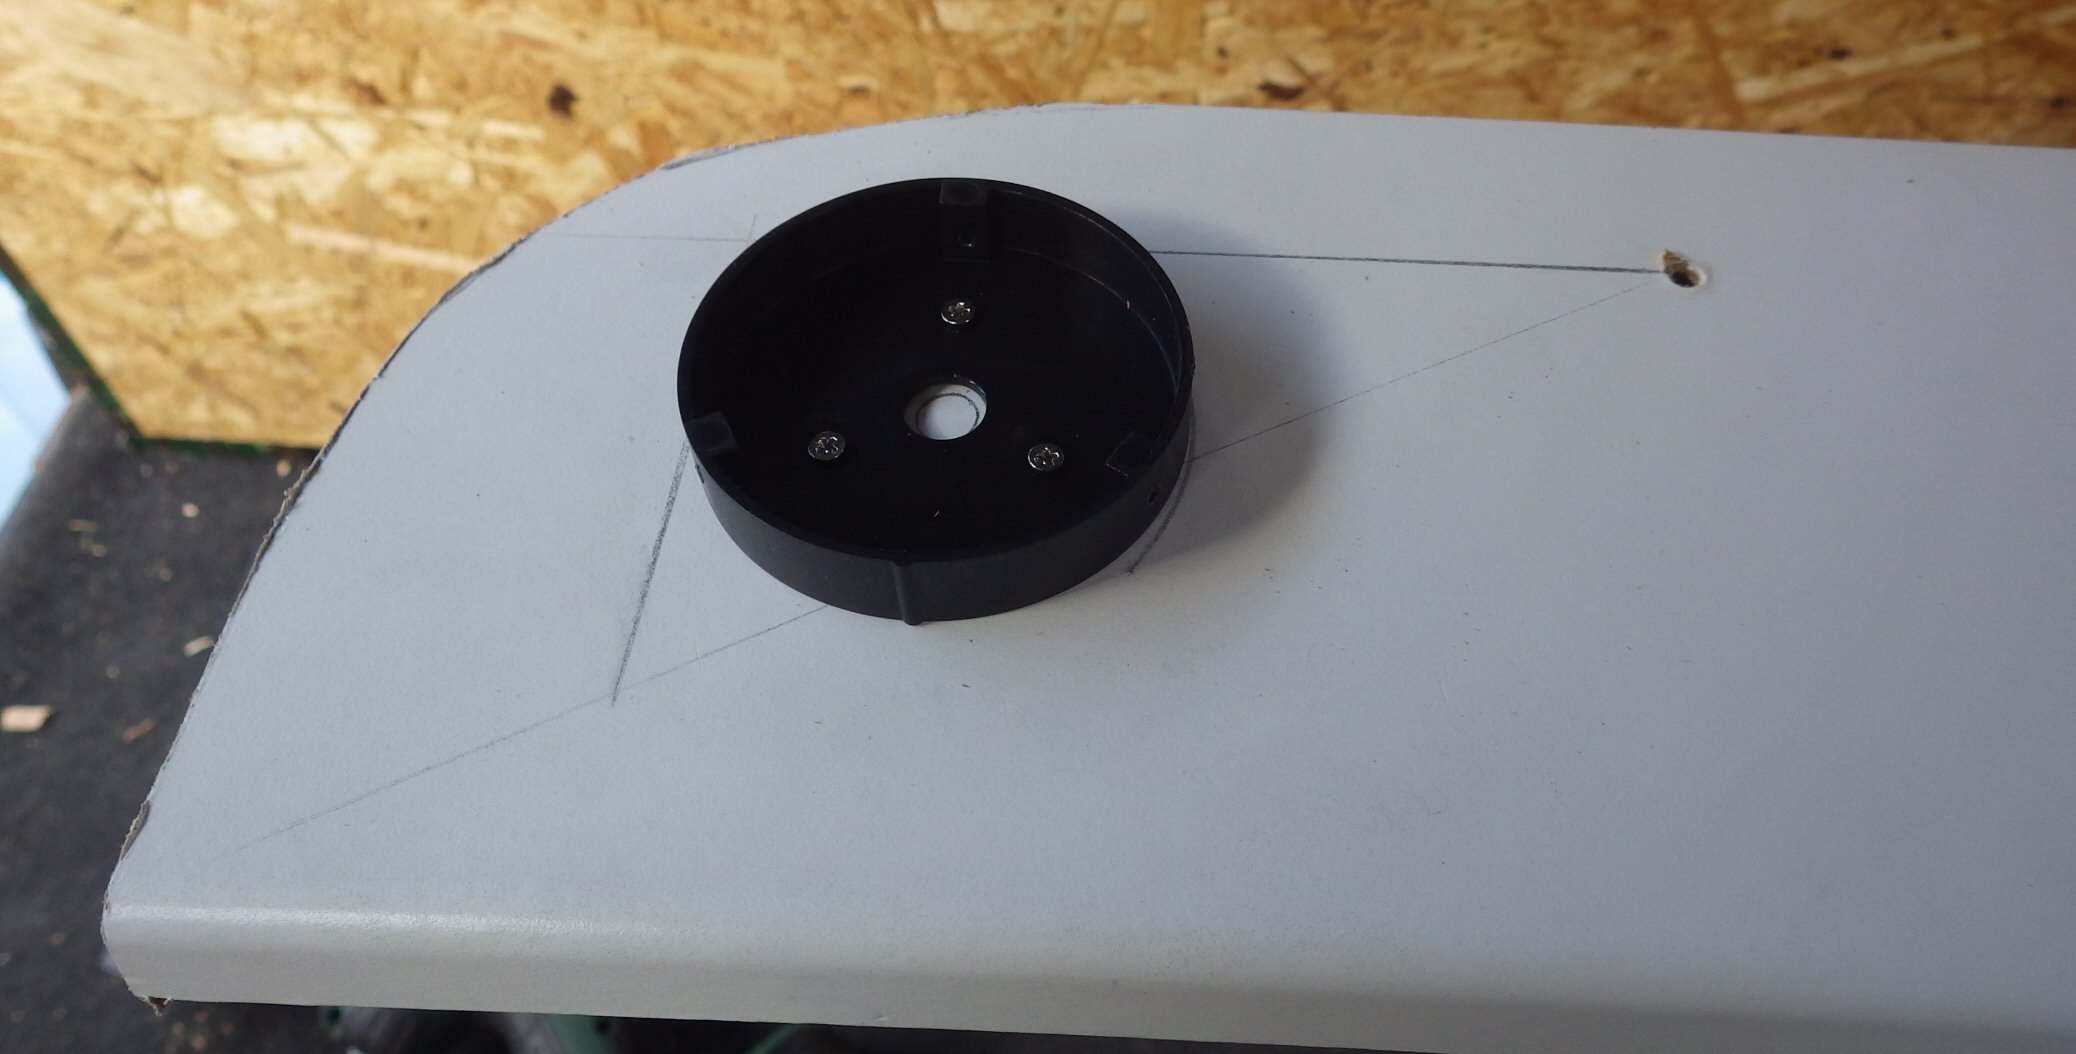
I replicated the shape on the final board using a cardboard cutout, and then used the position of the attachment screws to correctly aligned the spotlights.

In order to get the two spots working, I had to add even more cables behind the board and then reach the control cabinet to connect them to the 12v subsystem.

And since they are flexible, you can even change the location of the spot.
Storage
The other annoying thing when sleeping was that we had no practical places to keep the small stuff.We ended up putting the mobile phones and kindles stuck in corners between the mattress and the walls of the car, and the ear-plugs and keys under the pillows.
I bought one for the kitchen, and quickly realized why they were on sales: Most of the standard sized spice canisters you find in Norwegian shops are too large to fit in the rack!
After a bit of creative brainstorm we decided to see if it could be useful in the car.
Some measurements later we had a possible design solution.
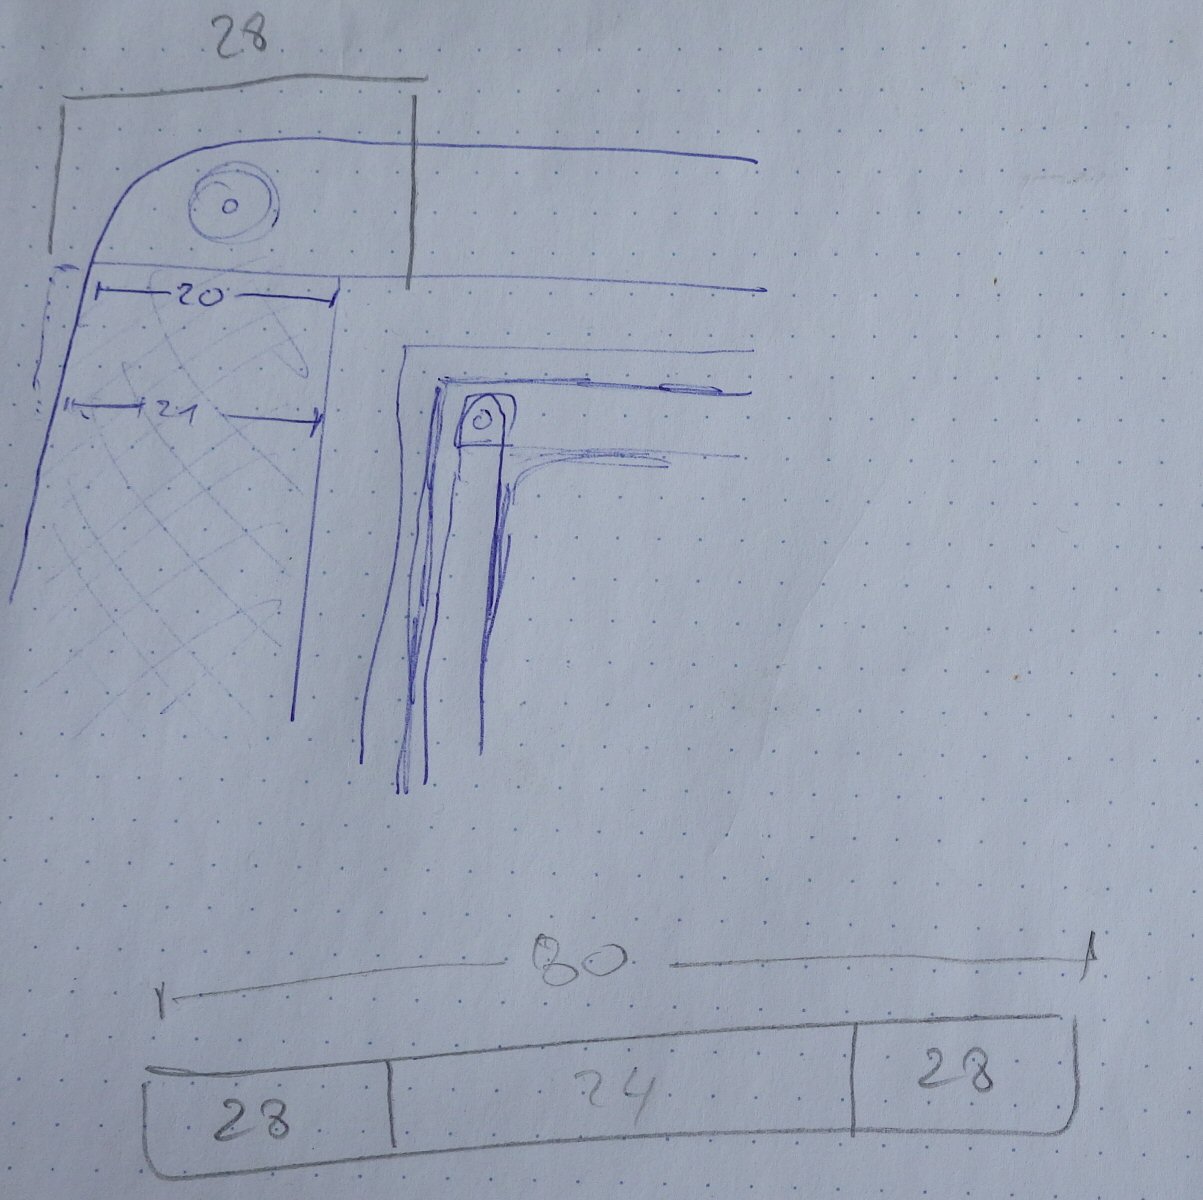
The idea is relatively simple, cut 28cm on each side, use the left side to the right, and the right side to the left.
If everything goes right, then all I would be left with is the center part2.

It's also very light weight and not particularly strong, but for small furniture work it's pretty much perfect.
The reason for the asymmetrical shape is to allow the back part of the storage unit to be inserter neatly into the insulation foam on the side wall, pretty much ensuring it would not move or vibrate.
The problem is of course that the side walls of the car are not vertical, and that the front part of the storage unit would have to deal with the curtains.

The easiest way to achieve a tight fit was to use some cardboard to capture the shape of the curtain cylinder, then reproduce it on the storage unit.
Drilling or sawing would have been difficult considering the tightness of the place, so I ended up using a simple cutter blade and some sandpaper.
Considering I spent less than three hours in total to built and install these shelves, I'm reasonably happy with the result.
I spent a bit of time sanding the edges to avoid painful head collisions, and at some point they will have to be painted, but that will be for another day.
At this point the most important thing on our mind is to get the car ready for the EU Kontrol.