 Refactoring
In both case you cannot really do a good job at it until you actually get to know most of the requirements, which is why we generally use plans, models or prototypes: They help us understand what has to be done.
In this particular case, the issue was the way we built the storage containers at the back of the car.
The prototype
Technically these boxes did their work quite nicely, and on the concept level they did what we wanted them to do:- Sturdy, so we could have a bed on them, sit or stand on them
- Practical, by allowing us to store stuff in them
- Versatile, by supporting various configurations, from utility vehicule to camper van with a bed and an intermediate half mode usable as a work table

I originally wanted to use some 12mm or 15mm marine1 grade plywood but I was not able to find any so we ended up using 15mm thick chipwood.
Technically that worked, but it tends to absorb moisture making things not fit anymore after a while and unfortunately this material is extremely brittle on the edges, leaving a trail of nasty spiky wood chips all around the car each time we moved the storage units.
You can see on the photo that the carpet on the ground is covered by them.
An additional issue is the way we built the covers, using two long boards connected by a single hinge: It works nicely as a support for the bed, but it also made it very difficult to access the storage area since we had to lift the entire side of the mattress.
Equipped with this battle tested knowledge, time to improve the design!
Refactoring time
- Limit the amount of changes to the minimum
- Make it look better by hiding the chipwood surface
- No more chipping
- Better accessibility
The easiest way to achieve the three first criteria was to wrap the existing chipwood structure with some sturdy and nice looking material.
The accessibility criteria would be achieved by splitting the top board in multiple sections.
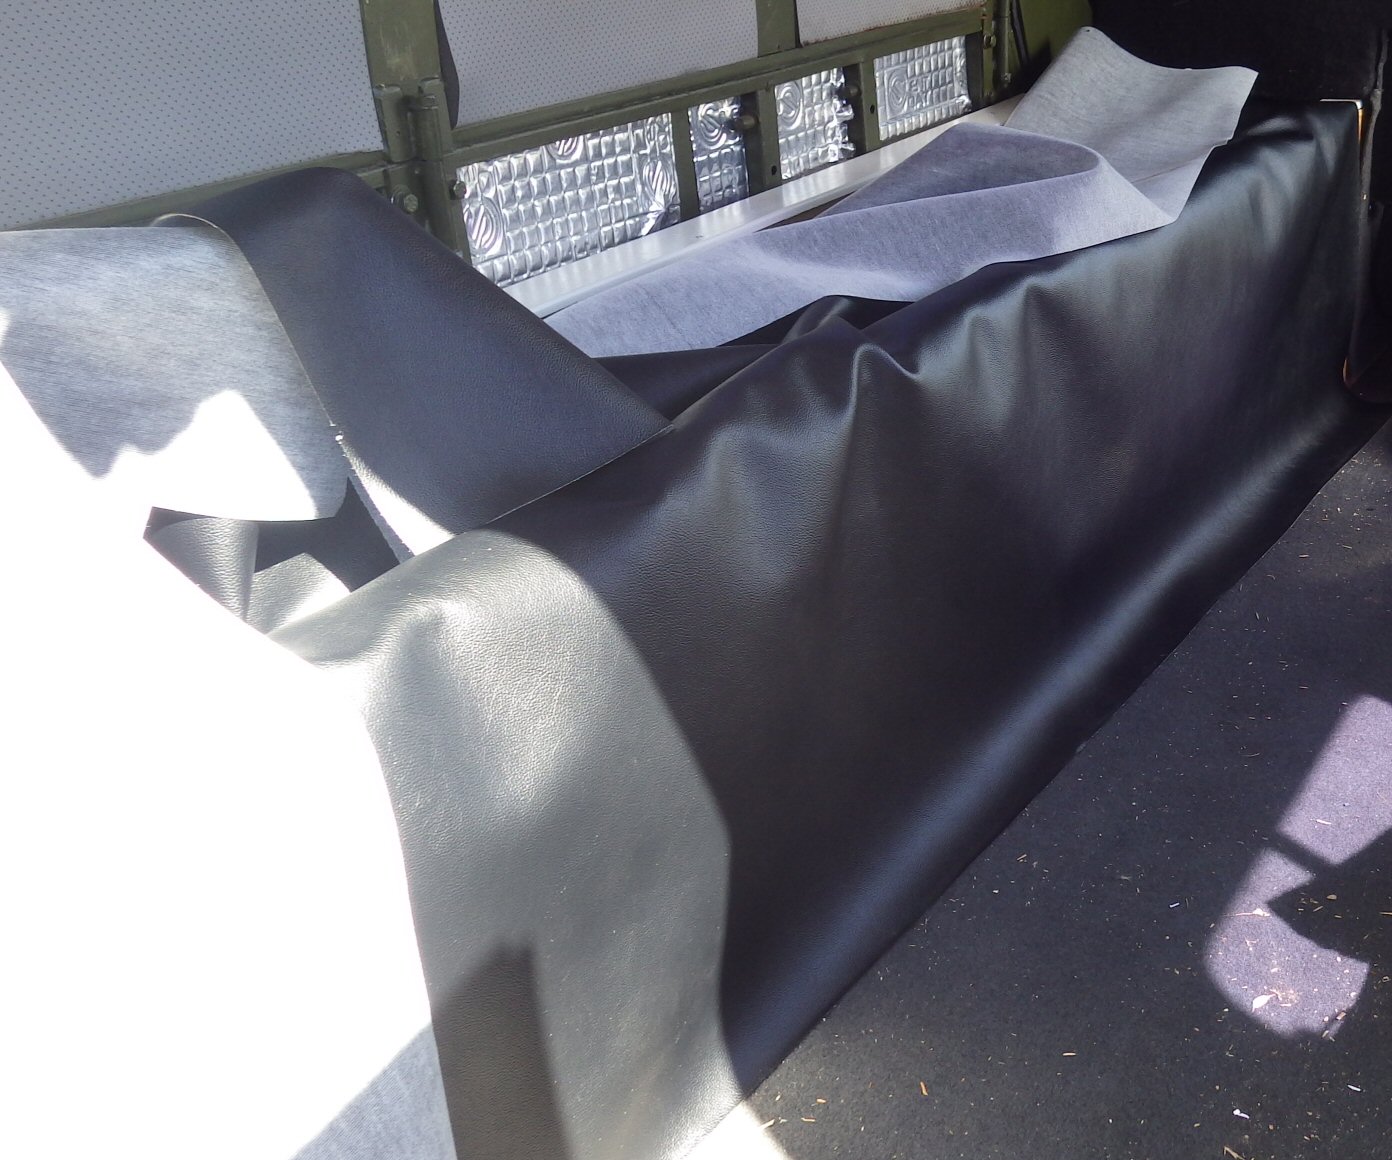
After some quick doodling we drove to a boat equipment shop which sold some leather imitation vinyl2 at a decent price, bought few3 square meters of the product, and back home I started to measure, cut, glue and staple.

By the way: I absolutely hate glue.
As usual, it's important to measure twice and cut once, but it's also very important to take into consideration that vinyl is somewhat stretchable which makes it easy to get a cut not be straight.
Also, remember to leave a few extra centimeters around the edges on the places where you can slide it around to get nice and neat edges (like at the bottom here where instead of cutting I pushed the vinyl into the tight space between the box and the floor)
Insulation panels
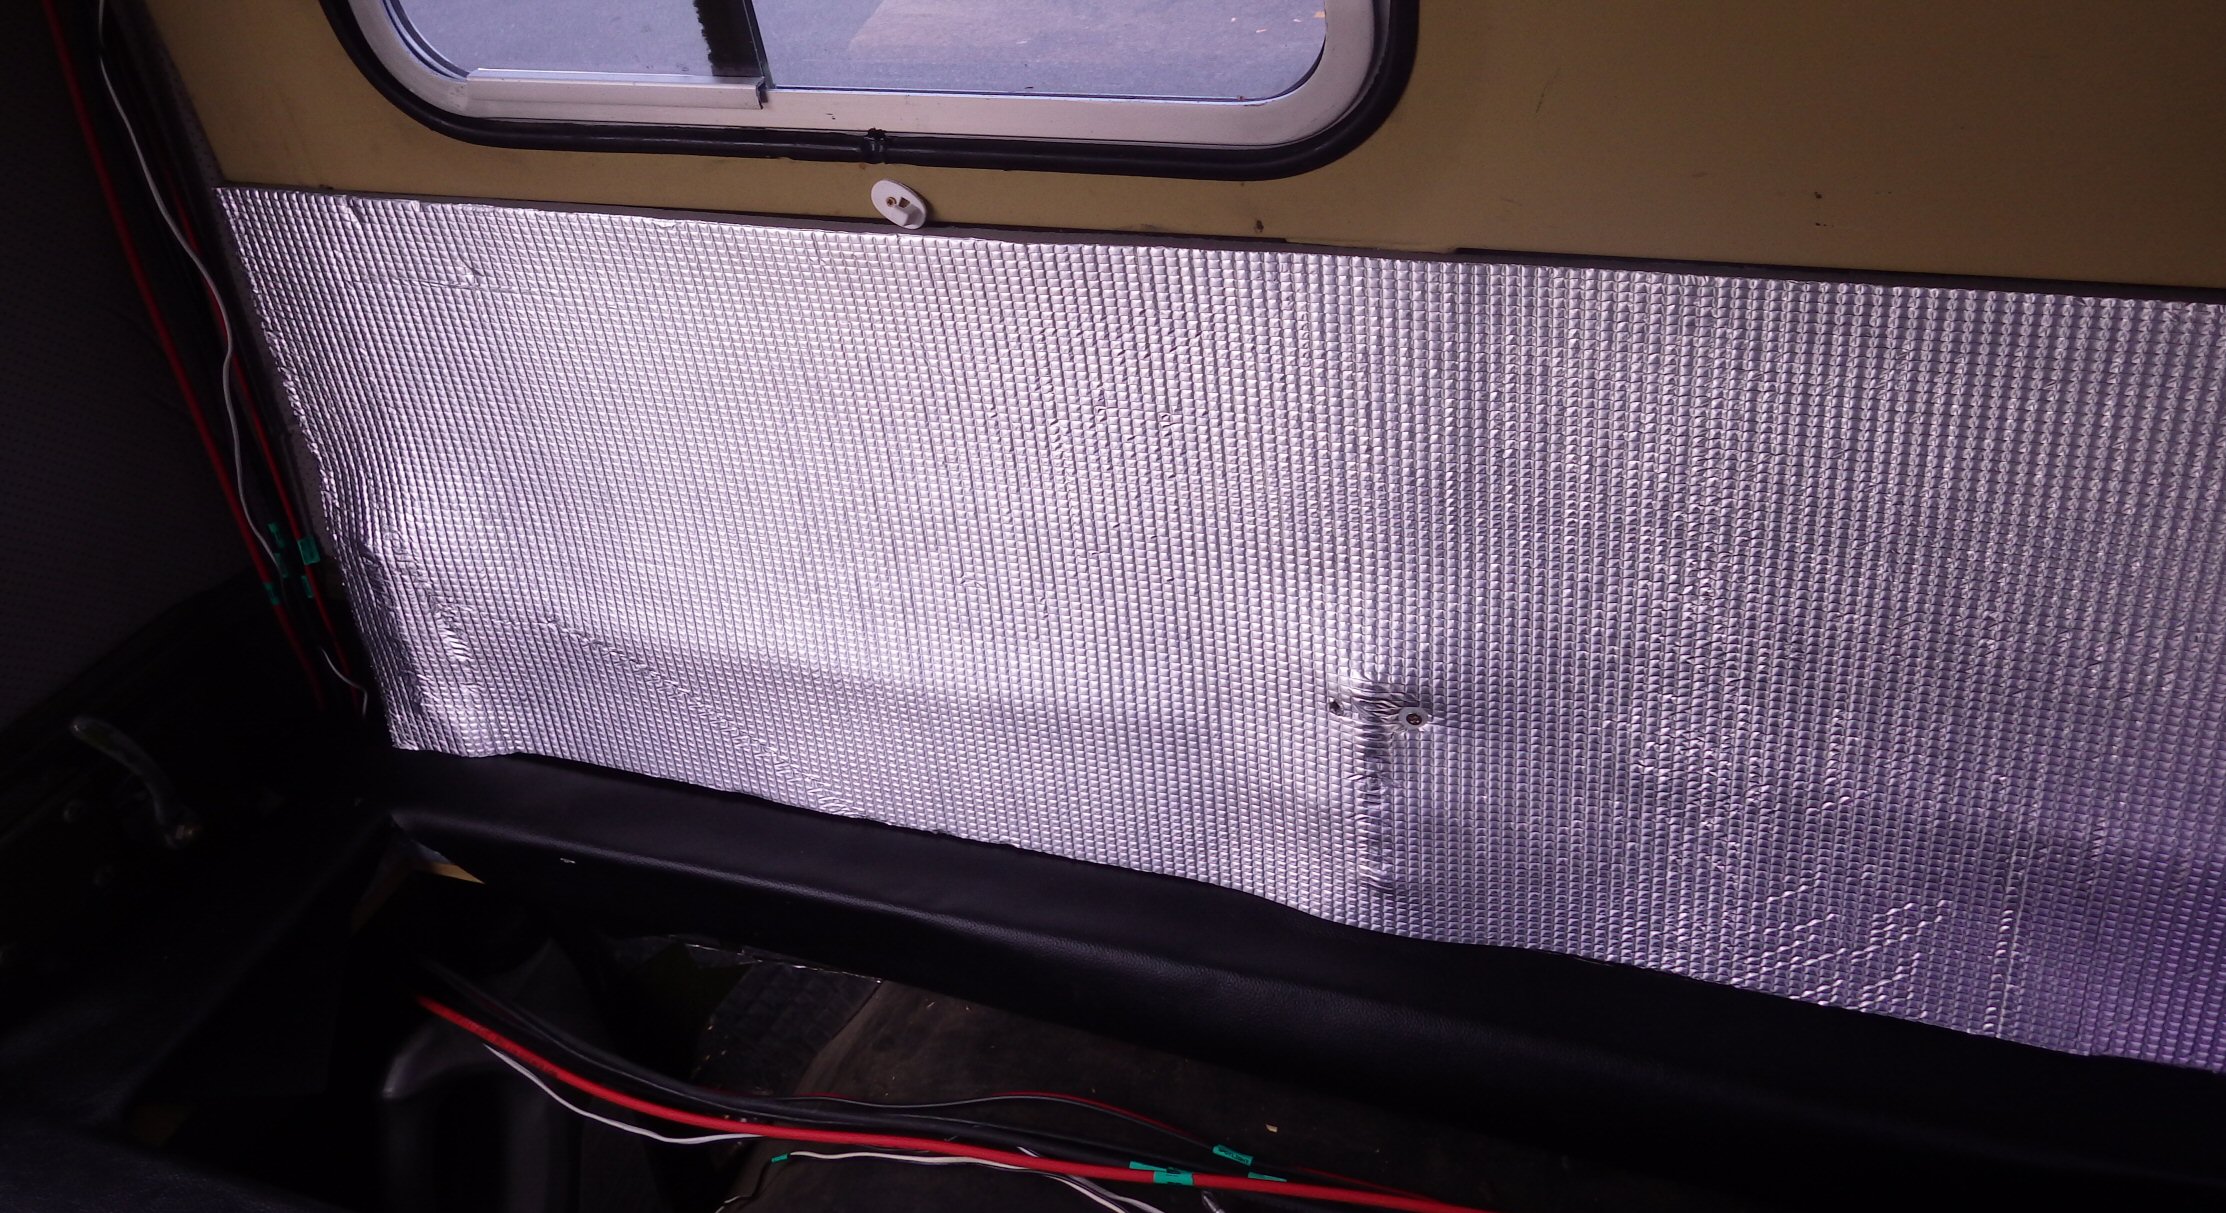
At this point in the installation, there was no material applied on the side walls of the car, neither were the side insulation panels installed.
Obviously this adds some thickness to the walls, which in turn would make it impossible to close the lids on the boxes.
I had to install the insulation panels4 before I could proceed with the lids.
Technically I should also have installed the new 3mm thick white vinyl we bought for the walls, but that would have required a lot more work than I had available time, so instead I tried to remember the need for an additional 3mm gap on all my measurements.
Building the lids
I have to admit it: Skills at wrapping Christmas gifts in paper don't really apply to upholstery.
You can just fold paper in the corners, make neat triangles, etc... with the thickness of the vinyl it just does not work.
It's just too thick and rigid.
This means you need to cut out everything that should not be there and limit material overlays as much as possible because they will be very visible.
After some less than successful attempts, I finally came up with something that looks like a folded out turtle shell pattern.

It fortunately was relatively easy to fold and keep in place with a large amount of glue and some forceful stapling.
The idea is to have the non visible side partially covered with a simple glued square of material, and then fold the larger part over it to hide whatever defect you created when cutting.
Additionally, a small strip of vinyl folds over the corner of the board to reinforce the angle and avoid the wood to pierce through.

At least that one is not too nasty, it allows repositioning, it's relatively easy to remove, so it's not that bad5.
Trying to position the material correctly, stretch it, staple it, ... all that while keeping your fingers free from glue, is just a freaking nightmare.
Ultimately the plan kind of worked, but since none of the lids was actually rectangular6 it made the folding very awkward and approximative.
Final installation

I started by painting in black the visible part of the metal hinges, then screwed them to each of the lids.
After checking that each lid could easily be moved independently of the others I screwed the second half of the hinge to the top frame of the storage unit.
We are not going to win any design contest, but the objective has been reached!
Obviously there is still quite some work to do, like correctly finishing the fitting of the vinyl inside the storage unit itself, and covering the wall with the nice white material.

I now need to take care of the second storage unit.
That one can be positioned either on the side (so it can be used as a bed) or over the other one (so it can be used as side storage while not blocking the loading area).
The plans for this second unit are quite different as we will try to integrate a set of drawers that can be used for easy access of the cooking equipment from the back of the car when camping.
This will require some careful planning and measuring to make sure things do not move around when driving, and specially when doing an emergency brake:
You don't want a fully loaded drawer unit flying through the car toward the driver and passenger.
1. Specially treated wood which copes nicely with high humidity environment, generally looks green tinted.↩
2. Sometimes called 'Skai' but that was another brand↩
3. Well, more like "a lot" of it :p↩
4. 10mm thick foam with an aluminium outer layer.↩
5. For reference, CascoProff Extreme Floor Adhesive↩
6. Nothing in the Volvo is straight. It looks straight, but it's not.↩